Pages

Sunday, May 31, 2015

Wooden Noah's Ark - night stand lamp - a NURSERY gift

Recently I had a babyshower in my place for three of our friends-soon-to-be-moms. We made ONE common celebration for three of them on one day, because they are going to have their babies in summer, and many of us are making holidays sooner or later, not all at the same time, so finding three different dates for moms, and friends, AND making three planning lines AND crafting would otherwise be tricky, if not impossible.

Yes, we had different themes but they worked well with each other. As to me I was in charge of crafting a part of gifts and particularly to ONE theme – Noah's Ark.

I've seen one interesting wooden Ark on Pinterest, a simplistic one, stained and with blueish patina, on wheels. That gave a kick of inspiration like yes, I could give it a try.

Truth to be told, the more I thought the more I realised, just copying woud be boring, but that Pinterest Ark had a nice feel, that means we needed something same, same but different. 

Re-create the feeling, but with another object, a new one - that's where the most sleepless hours have gone. Some other Pinterest models had an opening to maybe put a bunch of animals. That was a stumbling point for me and a lot of time was spent figuring out how to make the body of the Ark, so that it looked like a boat, like a real boat, all rounded, but massive and bulky in a good way. Because Noah's Ark had to be bulky.

What I came up with finally was making a sturdy boat body, not a hollow one. I put four pieces of wood, glued together, got one piece 14 x 14 cm square, and sawn the edges off so that a boat shape came out. A nice edgy rounded shape.

The upper part was inspired by another Noah's Ark, an old german shelf in a shape of Ark, looking like an old farmstead. Yes, I did some research on Arks, I didn't expect it'd fall into my lap, and most helpful results were the old documents, found on Pinterest, like illuminated manuscript pages, old models with particular, as I said, feeling around them, old illustrations. They all had something special, like details, harmony between elements and the main shape, it's difficult to describe, I repeat, it's a feeling.

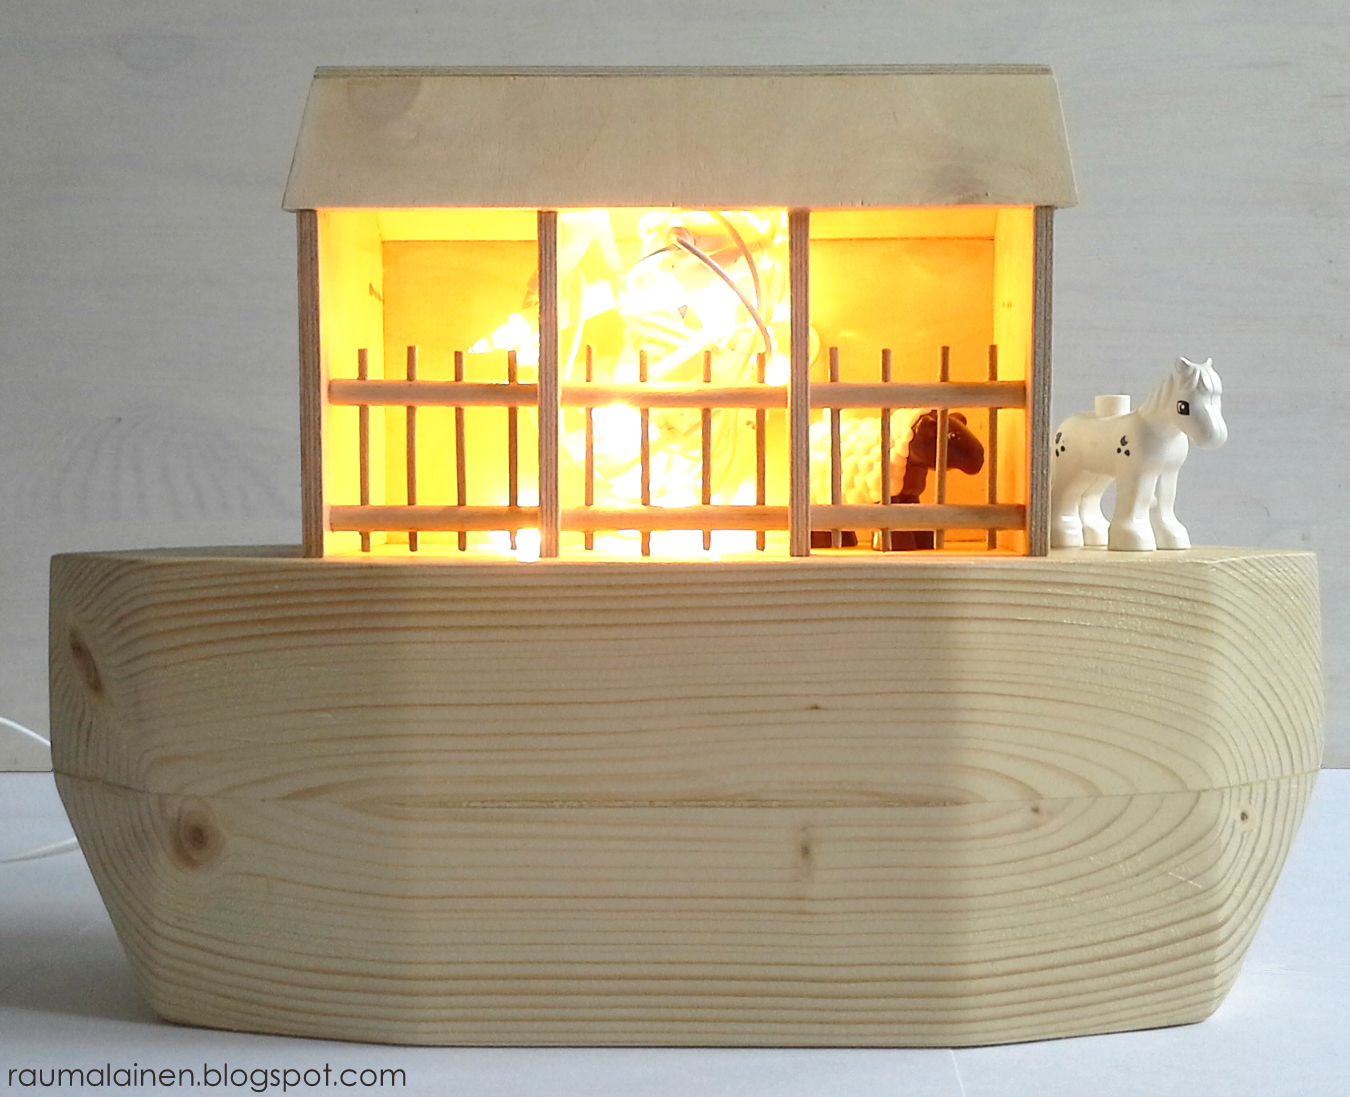
Last but not least – at some point, almost finishing the cuts I was thinking how to fill it or not (Playmobil, Lego Duplo animals), because the simple shape of those ones would suit the Ark the best. And that's how this Ark got a light garland. And turned into a night stand lamp.

It's possibly a bit too bright for a baby night stand, looking more like a boat on fire than a soft night light. And actually my friend-soon-to-be-mom needs to find another safer solution, because this garland is getting warm, and that's not great. Lets say, this garland was merely for gift presentation and to give some thought/visual stimulation how to use this Ark on purpose, or leave it as nursery deco. As to me, I would maybe try to find the weakest lighting garland and leave one or two bulbs on it, so that it gives only some hint of light, creating a cosy and softened light.


Mosaic magnets - DIY with kids

This sunday was Mother's Day in France. We're not in France, and my kids are small to recall of the fact (6 and 2 y.o) AND my husband deployed (not in France, because otherwise he'd take note. As long as he's absent I'm not watching television, and stay much less online, otherwise I would take note). Long story short - we all happily forgot it. Until yesterday a friend of mine asked me. Her daughter came for a sleep over at our place, and this project fall quickly in place - the little girl and my little girl made both those mosaic hearts as fridge magnets. I am only sharing it almost as the Mother's Day has gone over - sadly. But you can make those magnets without any special Mother's Day notion, right? Let's move!

I've spent half an hour drawing, drilling and sanding. And we spent all together half an hour choosing mosaics and putting them together - fun part. Mosaics was very free style, because it was late evening and last thing I wanted was to art direct anything. I was simply happy sitting nearby and listening to their thoughts on subject: like, "Look, I'd like to make eyes here, and a nose". "On a heart?" "Well, yes, see, it's coming out nicely, isn't it?".

Next morning I've put plaster and varnish - another quick-n-easy step, better without kids, because you have to be quick, precise, and careful. Please meet the happy magnets with candy colors!

And happy Mother's Day for those celebrating it to french calendar!


Tuesday, May 5, 2015

A wooden elephant stand for a card

Let's get back to making more detailed DIY posts, right? Though my internet connection is still poor, and there's no amelioration in sight (yes, believe me, though I can hardly believe myself as I'm writing those lines), and the DIY's are longer, picture heavy, and hence demand more upload time, let's take a risk!

That elephant from the previous post - he needed a card, and he got one. Here's the break down.

That's not an ordinary card, all together that's looking more like nursery deco. It's a wooden elephant, made of three parts - equal in outline, and one of three (the middle one) is cut so that there's a slot when I assembled them. In this slot we put a card.

Actually why not make a simple double folded one, with an elephant on a cover and call it a day? Too simple, right? Yep - actually this card had to give place to eight or ten inscriptions, and in a double folded one that would look messy, and nobody would probably bother writing more. Keep reading - that's fun, and great, when people take time and write more - jokes, thoughts, comments, tipps, own souvenirs, anything that's longer than two lines. Hence this card would (and I'd outline and insist while giving it for inscriptions) to take time and write. Something special. Everybody can write something special if he/she takes time, I believe.

I wanted to make a folded card - sort of dividing it all in pages, yet being all on a one piece of paper. There're fabric inlets to divide, create some visual interest, and match the stuffed toy I've made previously.

Well, back to the elephant - it's a sturdy one, my plywood was 9 mm thick, threefold it brings to 2,7 cm, slightly over 1", so it stands pretty well. This elephant wasn't initially planned. It came as an answer to the question - how to make a folded card look nicely and not fall apart without any ribbons of other closing/holding together fussiness. The elephant was the answer, made as a stand, to slip the card into and hold it perfectly.

That's all, try it out, it doesn't take long if you have some basic sawing experience, pay attention to exactly where you cut, and have some patience for sanding. Mines weren't exactly perfectly equal, so yes, I've spent one evening watching a movie and sanding - but that doesn't sound that bad, right?