Pages

Sunday, July 27, 2014

Wooden pirate play sword - DIY tutorial

Hey there!

This morning my little girl has been looking though her magazine and stumbled upon an article about pirates. "I need a pirate sword" - she told me. "Here're also instructions, mum. You have a piece of cardboard right?"  Yes, I had a piece of cardboard, and why not, I mean any pirate needs a sword, I agree. And yes, why not playing pirates? But sword of  a cardboard? Nope.

It got my wheels spinning around. Yes, I could have waited till tomorrow and go buy a simple plastic sword, or, even better, go to a second hand toy store and hope there'd be an old toy sword for sale. Or make it myself right now. A nice simple wooden one. 

Cutting a simple sword shape out of a wooden board scrap? Why not, but probably way too simple and not that interesting. Making a grip somehow different, maybe something more rounded for nice hold? A couple of minutes later I had it in mind and the baby boy has been napping. I figured out it wouldn't take too much time and luckily I could almost finish it pretty quickly.

It hasn't got any special finish, nor could I photo shoot it properly, with probably a cute pocket I could have done, but not yet. I still do not know if we'll continue riding this pirate wave, so I just share this tutorial right now, or I may simply loose it in many drafts and projects-on-go.


Saturday, July 26, 2014

Making a gift for a teacher - a monoprint pillow case

Hey there,

recently we've made a present for my little girl's teacher at the pre-school. This post is a short description of the process, because I didn't have the detailed step-by-step pictures.

Basically you need a piece of cloth per kid, some paints, and a plain plate, roller and palette knife to mix the paint as well.

You roll the paint on the plate and give a stick /cotton swab to a kid and ask him to quickly draw something. After that you press a piece of cloth onto the plate and the result is nice and saturated print. A monoprint, because you cannot repeat it with exactly the same drawing. In our case I've made each kid make at least two prints to choose from and have some more options for final composition.

This is a very easy and fun technique to work with kids, and they love it.

At some point I've had many of them, without any particular purpose in mind other than squeeze in a short crafting session to keep our little invites busy and make them make something special. Then the end of the school year was approaching, and we started thinking what to gift to the teacher. A common gift from all the parents, surely, but also something crafted by kids and made by their little hands.That's how this patchwork pillow came into life.

I've cut all the prints to the same size, arranged and re-arranged, then sewn them together, cut paper stencils for names, hand printed names and that's it!

P.S. This pillow is double sided, there're also monoprints on the second side, but unfortunately I don't have pictures of them.


Tuesday, July 15, 2014

A new album and about happy incidents along the way

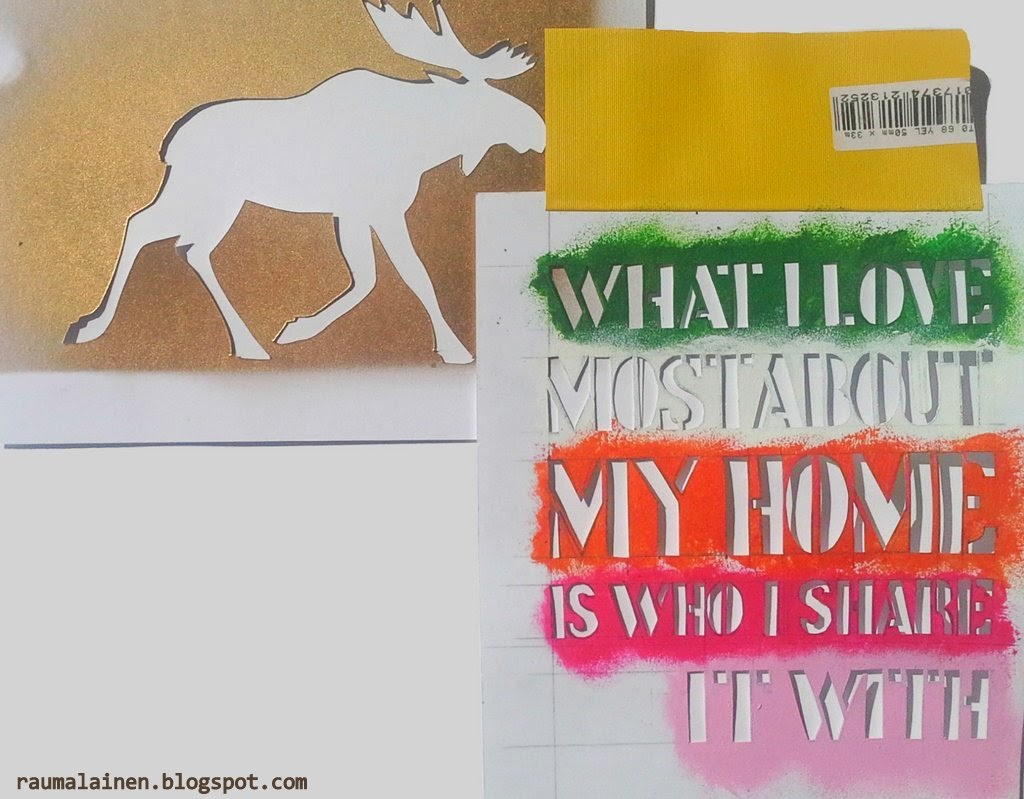
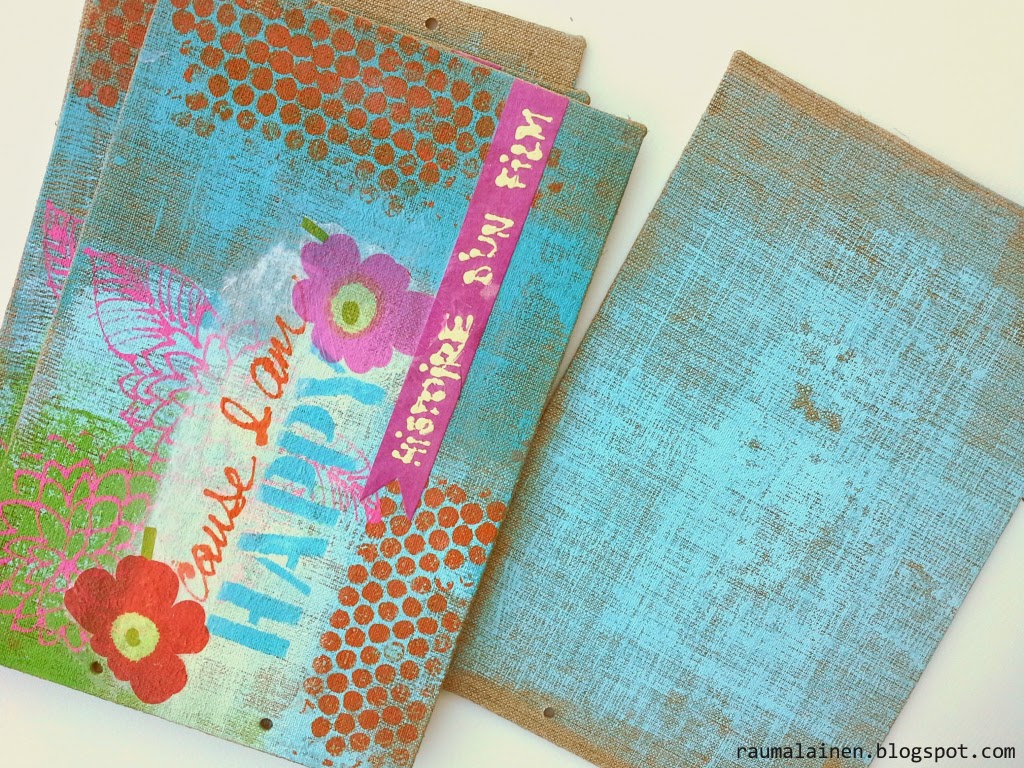
Please meet another album. We have friends who moved recently to a new house, that's why there's the "What I love most about MY HOME is who I share it with" on the cover. I've cut this phrase as a stencil after I've seen it very many times on Pinterest, because I was looking for a quote about home and this one killed it.

Plus we all live in Finland, and  I have been preparing another project which involved a stencil of a moose based on a finnish road warning sign (found here). 

Actually I didn't mean to put the moose onto, but somehow the finished cover was missing un "je ne sais quoi", something playful and random to make the whole thing look a bit upbeat and fresh. Happily I has my moose stencil cut while pausing from the album project and waiting for the paints to dry. Coincidently the stencil and the album happened to be both at the same time at the same place. 

And another happy incident was that I've messed up a couple of inches on the album cover. One more flower to hide it didn't help. But a moose stencil would if only I'd find the right colour! I've bought a golden spray paint that morning coincidently, for another project, so off it went to put a golden moose to the cover.

It looks a bit blurred (which by the way doesn't hurt), maybe because of the coarse linen surface. As I was featuring the same moose on the white plain pages, it's looking much clearer, and it has that nice shimmer - that was the element I've been missing, and I'm THAT happy about all the coincidents along the way!


Monday, July 14, 2014

DIY tutorial - how to make an album

Today I'm going to show you how you can make a beautiful album with some basic supplies - cardboard, white paper, paints, bubble foil, some glue and linen fabric, and paper napkins. Let's break down in steps. 


Thursday, July 10, 2014

Quick overview for upcoming projects

Hey there, I know it's been quite a long bit of silence here.  And there're lots of drafts waiting to get finished and uploaded. And we've been on vacation. And I've had tons of work before leaving. That's the long story short. 

I'll have to write a separate post about our vacation on Lofoten, in Norway, because it was just THAT great, and then there're very many fun projects that I'm going to share with you. All that means I'm just popping up here today to say hello and give you a little peek into upcoming posts  - fun fabric pillows, going on with wood recycling, making new albums. Stay tuned!