Pages

Tuesday, September 23, 2014

Some new colours on the palette

Hey there, new colours friends, but that's been just a fun project I'm trying out because I have a friend who loves violet. And orange. Not an easy colour, the violet, at least not for me! If you follow me since awhile, there're all sorts of teals, pink and orange hues, some olive greens and colours of natural unbleached linen, that's pretty all I have in my program, or on my palette. And I love them.

When I have to paint landscapes, there're actually all of those listed above. With some more colder blues, like ultramarine and cobalt, but rarely purples nor violets. I do love them for shadows though, the deep aubergine hue, it's pretty awesome, or some greyish cold violets for skies or sees, or any other light reflexions.

That's the challenge, my friends, that's quite a challenge for me to build something around violets I would personally love which wouldn't feel like "I have to", but being more of "Not bad, I could love it".

I still hesitate about this one. More lilac than violet, and slightly less orange, like more warm yellow and some warm red hue which would give a nice orange if I'd mixed them. Which I didn't do, and that's okay. I love the funky graffity-like vibe it has, with all the splashes of colour around, dynamic and young.

Now I have to fill the pages and come back to you sharing the whole project. I just popped up, still in doubt but actually surprised, how it turned out. Not bad, I could love it!


Monday, September 22, 2014

Upcycling an old desk into shelves

Hello friends,
remember, I've been talking here and there about upcycling projects a while ago? Let's move along and turn an old thrifted desk (part of it) into some useful boards/shelves, you name it!

This cute little old buddy was found at a thrift store, and it was all they had: no desktop, no other parts, just this sad piece of four drawers, solid wood (except of bottom part of drawers), in pretty good condition. At a bargain price, because who would normally buy THIS?

In the meantime I've spotted the idea of turning drawers into shelves and boards during our vacation in Norway this summer on a TV-show named REDESIGN, which I unfortunately cannot find online. So this little thing was just a perfect find to give it a try.

Basically you need only to repaint it as you like (I've gone for a thin coat of white, semi-gloss, I wanted the wooden grain to be seen a bit), and some basic experience with power drill and chisel. That's all it takes.

If you are going to make a magazine board, you will need a piece of wooden latch, so that your magazines do not slip down the second you put them into.

I apologize for poor final pictures. Actually this project's result was four boards, two of them you see here on this initially underlighted, yellowy and not that contrasted pics. And two others are still waiting to be hung, which I hoped would have happened earlier, at a better-lit place so I'd be able to show the best of it. Still not happened, and now as the days get shorter and darker, I fear I might not be able to get good pictures till the snow comes and it all gets white, light and sunny again.


Friday, September 12, 2014

Pillow case in monoprinting technique

Last month we've made this fun project with kids. It was a rainy afternoon, we had strawberries, ice and cookies, but the objective was to craft a pillow for a friend who was going to leave Finland soon. And this gift was a gift from kids.

Each of them got a piece of plexiglas plate, we helped to put paint, and they drew something onto. We had some horses, dragons, fishermen, but also princesses, houses, a mermaid and other simple things. And there has been a toddler as well who simply put some abstract lines and we helped him make a hand print.

The drawing have been made in monoprinting technique, the kids have been using the cotton swabs. We put a piece of cloth onto each plexiglas plate with a drawing and got a print. It's tricky sometimes, as they come out more or less saturated, and the drawing is more or less clear.

This time instead of putting the names of kids, I've made the ABC, because some kids have made two pieces, the ages were different and I wanted to avoid comparison and evaluations. The ABC keeps it more neutral, but adds an interesting detail. and will be useful, since our friend has two small kids who may enjoy having around this fun pillow to read.

Don't be surprised about muted colours, because this pillow was custom made and it simply has to be muted to best fit the home of the recipient, so yes, though it was not exactly a custom order, but sort of what our custom/friend would have expected. Next project will come in vivid colours as usual, I promise!


Monday, September 8, 2014

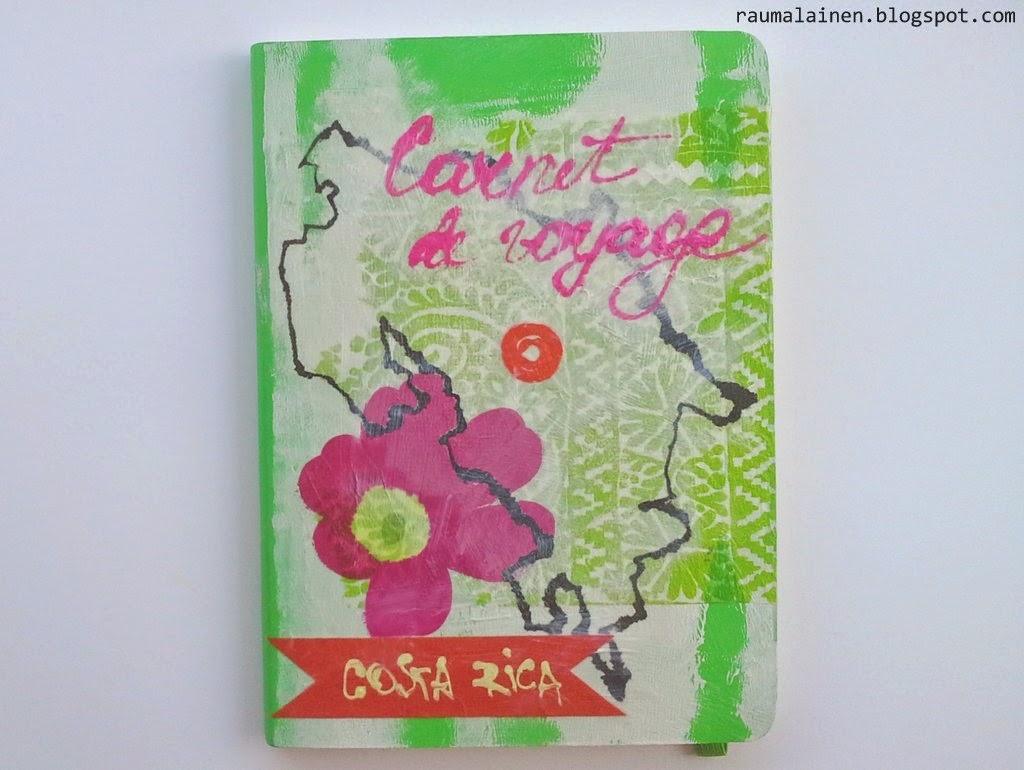
Quick weekend project - a traveller notebook

Hi there! Just a sneak peek of a project shortly done at a last minute past weekend. It is going to be another busy renovation week at our place, but I hope I can pop up another time soon. There're some more fun upcoming stationery projects I wanted to talk about here. And probably this one deserves a tutorial as well. We'll see by the end of the week. 

No we're not going to Costa Rica, but our friends do. 

That kind of projects is always welcome - a notebook in a nice colour and freedom to make whatever I want, subjet to the only condition that the destination had to be mentioned. 


Tuesday, September 2, 2014

DIY-tutorial: MAGNETS

Hello my friends, and hello blog, I haven't forgotten any of you! Yes, it's been quite a long time here with nothing new. And you know what? I've spent a very busy summer indeed. And no I'm not kidding. I was just not busy with the blog. Not at all, and yes, I'm sorry for the break. But it was very much needed. 

There's been lot of thrifting, furniture moving, repair, repaint and more moving. It's our third year so far in Finland, in this rented place. During our first year I didn't bother about poor rented furniture which came along with the house to actually spare us the furniture shopping. During our second year I got pregnant, the baby boy was born (a toddler already by the way), I was too tired to make any shifts. 

So now by the beginning of the summer I started changing things. Moving the rentals out and filling the gaps with what we need, what we like and what feels like our place.  

I mean, yes, why bother, you would probably ask. And sometimes I ask myself as well, pretty the same question. I will certainly not make over everything. But with a good dozen of nice pieces here and there, some more work to move around, repaint, and customize the existent and neutral ones, with thrifted accesories and nice modern fabrics it's surely doable. I'm not that far yet, but the way feels right. It's a crazy amount of work, taking into account that I made it during the summer, when both kids were at home all day long.

So far so good. Now it's time to make over the blog. It's insanely outdated, all the features are so bothering me. I wish I could not write those lines and first make some steps, so that you see the results. But I guess it has to be more of a complete make over, and now I'm up to learn how to do it. I don't know yet if I'll keep the name (nice, but long, and that bums me out), this format is not going to last, I'm literally sick of it, and probably that's the reason I was not that much present here either.

Now let's get back to crafty life, my friends. It actually hasn't stopped, but it's time to give you another inspirational project! Thrifted have been: an old frame, and ply wood - to make a fun magnet board and cute magnets.

This tutorial is about the magnets, not the board. Just a few words about the latter: it was old, big and heavy,  and sad - something golden and grey and crimson  - with a poor oil painting inside. I have sanded and repainted it in red. I also made an inlet of a piece of fiberboard that I cut to size, and coated it with magnetic paint. That's all! And I have to say I'm THAT jealous and happy about a good friend who got this gift. 

Happy birthday, CĂ©line!