Pages

Wednesday, December 10, 2014

Christmas tree balls - DIY tutorial with kids

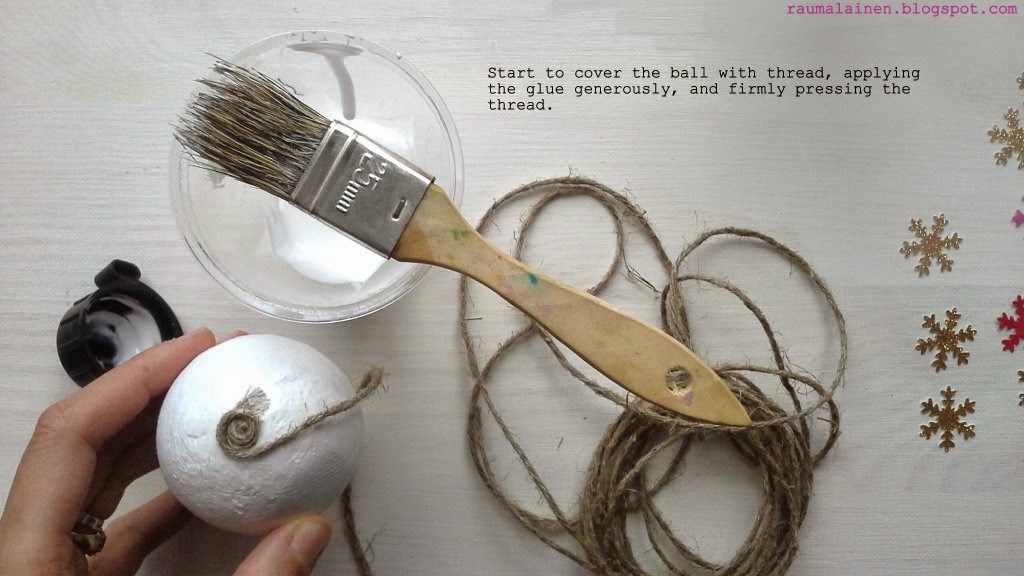
Another simple project where you only basically need: styrofoam (or paper mâché) balls, linen thread and some paper scraps (optionally salt dough, wooden beads and fabric scraps for bows).

This was a small project being part of Christmas crafting workshop I've made recently with kids. And this one was the last in a row and the most simple one - the kids only had to put snowflakes and make stars of salt dough.

I think this idea of thread covered balls has many other possibilities - as for application. Layering different kinds of materials is for example one of those. Stay tuned for more ideas!


Wednesday, December 3, 2014

DIY tutorial - salt dough SNOWMEN fridge magnets

Today we have salt dough snowmen on menu - they could be cute gifts for Christmas hand made by your kids!

I shall have a bigger post on salt dough coming up soon, but you already probably know the recipe, it's pretty simple and easy to find. Stay tuned for more tricks and other ideas about salt dough.

We made it with kids. If that's what you are going to do, make your own mockup first to check if your magnet can hold the weight of baked snowman, that's not as obvious as it may seem!   As you see on the picture, I had some stronger magnets, I guess thinner ones won't do the job!


Monday, December 1, 2014

Wooden REINDEERS - a DIY tutorial to make with kids for CHRISTMAS

Hey there! Let's start the HOLIDAY SEASON, shall we?

I have some fun small craft projects upcoming in December: wood scraps, fabric scraps, salt dough (NEW!!), wool - those are some basic materials. I'm going to show you how to use and create some festive cards, decorative objects and share some simple ideas to craft with your kids and spend quality time together - because that's what the coming month is about.

Here's one of three projects for this week: a REINDEER. Follow the drawings to make it - it's as simple as that!

Just one VERY important note for that kind of project about balance: you need to put ALL the decorations to the neck WHILE the glue is not dried yet, so that you can find the right balance for the reindeer turning and slightly bending his legs. You cannot make any adjustments after the glue is set, unless you break the legs and start over again. This reindeer has an IMPORTANT amount of weight on this neck, so it would tend to tilt forward unless you make some adjustments on balance.

Stay tuned for further Christmas projects this week!


Monday, November 17, 2014

Making-of Christmas calender and cards

Lately, the last weekend to be precise, I've discovered Tallinn. The ferry from Helsinki only takes two hours to get there. And before we have stayed for like almost three weeks in Malta, on Gozo island. That's about why it took me so long to get back to the blog.

Malta took me by surprise - not only that I haven't expected it to be so different from what we've seen in Europe before. Or I should better speak of Gozo - a smaller island, with less tourist infrastructure and therefore being a bit more authentic in my opinion. I've seen too little of Malta itself to be able to judge on the whole. I ended up loving Gozo, which was unexpected, it was not a love at first sight. Probably for better. And three weeks spent there is not an argument to justify my ability to evaluate anything on this island. I had a feeling though that we have been living in Gozo for far longer than just three weeks. That's probably because of our "first-time-here", when every impression, especially a new one, which has been never experienced before (architecture, nature, cooking, way of life, new acquaintances, habits, local products, just to name a few) seems to be more intense and time passes away differently, or at least seems to. But I'm not going to speak about this today.

We didn't plan to go to Tallinn, but we were in Helsinki, just around the corner, so "why not".

Here's why we are talking here about travels - it's about what I learn about, or more precisely from countries. There's a whole lot, and there're also lots of angles a country can be interesting. My angle is and will probably remain the handicrafts. As well as spotting the structures, colors, patterns in architecture and nature that would be in my opinion "typical" and of course new from what I have known or seen before.

I got new books about Gozo lace, estonian embroidery, knitting mittens, weaving belts, some handmade memorabilia. What else? A couple of books on maltese architecture and history - that's something challenging as well since there're patterns, shapes, figures and other inspirational material that can be potentially diverted into handicraft motifs and sparkle new ideas.

I guess we missed a lot, but that's okay - I got back home with the feeling that I found some inspirational themes to keep me going in next months. I wish I could have an opportunity to also learn a bit more of the techniques staying in the country, like some weaving, and get my hands on it, or get some more insight into the meaning of estonian/baltic ornaments, or visit some more museums and have more time to look around. I'm happy with what I could find, make and learn, I'm quite happy, my friends.

What about work? Since I last posted here last month, precisely one month ago, I had like about eight productive days or so, and that's what came up and is coming up soon. I've recently made a Christmas calender - something I wanted to make since many years but got lost each time in too many ideas/techniques etc. There have been some Christmas cards as well, tutorial coming soon. Those ones came spontaneously as a side project from left-overs from the calender.

The calender is finished now and offered to a friend, and no, I do not have pictures of the result. But I'm working on another one, pretty similar, and then comes one more, and you will have more peeks, how-to's and explanations. The starting point was a vintage linen curtain I got this summer, because I loved the pattern. This calender project was the perfect match to give this curtain a new life!
Stay tuned!


Thursday, October 16, 2014

New ALBUM

This is a new album entitled in french " 27 PROJETS pas comme les autres" (27 projects other than usual). I have a friend, who just turned 27 years, and shortly after actually my own anniversary back in September I've been thinking about making a list of N projects corresponding to that age of N years (thirty-five in my case), and listing those projects to be accomplished in a new coming year. Or maybe documenting the N projects we've been making/living/dreaming of/reading/messing up or working on during the past year.

I didn't have time to tackle it for myself, but the idea got stuck in my head. So that's how it got into life - now my friend is hopefully going to document the twenty-seven fun projects/ideas/whatsoever about her life and her family's life in this brand new album.

It's getting better, the album making process. It's less painful because I'm making less mistakes, and I've learned  by doing them lots of useful tricks and techniques how to make it look more what I expect it to look like. Weird colors, lots of violets and that splash of vivid orange - no comments, it just happened.

And yes, the pages are matched to the cover, with same patterns, colors, sometimes a bit softer, so that they don't pop up too much, because they only need to be inviting and inspiring but not outrival the coming content.

As usual those past weeks, I don't have a tutorial for now. I will come next time with a bit more explanatory post sharing some detailed thoughts about the making-of and showing new upcoming albums. Stay tuned!


Monday, October 6, 2014

Gift boxes - from old books, wood scraps, linen and paper

Another project from summer, a pretty new and challenging one.

There have been two old books, an old piece of wood (cheap plywood from a charity shop), a scrap of natural linen and paper scraps. They turned into those two boxes, which I've made for a friend, another friend leaving Finland. I wasn't in charge of filling, the big box contained pictures, quotes, keepsakes, and I didn't attend the farewell party, so I didn't come to see the end result. Other small box was filled with tea bags with handwritten quotes on them.

I have to get to make a couple more so that I can systematize the process and get to describe it better. For the time being it's just sharing with you some pics from behind-the-scene. It was fun and challenging, and actually I'm not quite sure I keep going this way, because all the fine adjustment which box making implies is probably not my cup of tea. Not that much, though designing the cover was the most appealing part for me AND that project was very different from all the sewing and paper stationery making from previous months, so YES, I loved it.

The "hardware" (book cover, wood) for the project have been thrifted. That's also the first time I've drawn the Moomins other than just for my little girl's colorings. First I've been thinking of using some existing book drawings, but I haven't found any of them that would match the idea. So I've made them myself, with ink on nice heavy paper, cut and watercolored them partially. They are bringing pretty much light onto the surface and are simply fun to look at.

That's it, I guess now I'm shifting towards one, at most two posts per week which I don't think is enough. I've debated about coming more often but that would mean I'd have to fill the gaps with some more randomness and watering down the purpose. I've been thinking about outsourcing more random "around-here"'s on Instagram or Twitter (nope, I'm not an Instagrammer yet, and my Twitter account is pretty silent), and just keep this blog more project-centered with "behind-the-scene" focused on work, less on life randomness.

This blog had lot of random content in previous years, some photographs, lot of random stuff around, but I don't like to look back at them right at the moment. I prefer this blog offers a nice and neat track of DIY projects, tutorials and peeks into behind-the scenes. On the other hand sometimes it feels good to share something more out-of-box. I just have to find the proper way to do it.

That means right now it is going to be less updated, but I hope to catch up soon.


Tuesday, September 23, 2014

Some new colours on the palette

Hey there, new colours friends, but that's been just a fun project I'm trying out because I have a friend who loves violet. And orange. Not an easy colour, the violet, at least not for me! If you follow me since awhile, there're all sorts of teals, pink and orange hues, some olive greens and colours of natural unbleached linen, that's pretty all I have in my program, or on my palette. And I love them.

When I have to paint landscapes, there're actually all of those listed above. With some more colder blues, like ultramarine and cobalt, but rarely purples nor violets. I do love them for shadows though, the deep aubergine hue, it's pretty awesome, or some greyish cold violets for skies or sees, or any other light reflexions.

That's the challenge, my friends, that's quite a challenge for me to build something around violets I would personally love which wouldn't feel like "I have to", but being more of "Not bad, I could love it".

I still hesitate about this one. More lilac than violet, and slightly less orange, like more warm yellow and some warm red hue which would give a nice orange if I'd mixed them. Which I didn't do, and that's okay. I love the funky graffity-like vibe it has, with all the splashes of colour around, dynamic and young.

Now I have to fill the pages and come back to you sharing the whole project. I just popped up, still in doubt but actually surprised, how it turned out. Not bad, I could love it!


Monday, September 22, 2014

Upcycling an old desk into shelves

Hello friends,
remember, I've been talking here and there about upcycling projects a while ago? Let's move along and turn an old thrifted desk (part of it) into some useful boards/shelves, you name it!

This cute little old buddy was found at a thrift store, and it was all they had: no desktop, no other parts, just this sad piece of four drawers, solid wood (except of bottom part of drawers), in pretty good condition. At a bargain price, because who would normally buy THIS?

In the meantime I've spotted the idea of turning drawers into shelves and boards during our vacation in Norway this summer on a TV-show named REDESIGN, which I unfortunately cannot find online. So this little thing was just a perfect find to give it a try.

Basically you need only to repaint it as you like (I've gone for a thin coat of white, semi-gloss, I wanted the wooden grain to be seen a bit), and some basic experience with power drill and chisel. That's all it takes.

If you are going to make a magazine board, you will need a piece of wooden latch, so that your magazines do not slip down the second you put them into.

I apologize for poor final pictures. Actually this project's result was four boards, two of them you see here on this initially underlighted, yellowy and not that contrasted pics. And two others are still waiting to be hung, which I hoped would have happened earlier, at a better-lit place so I'd be able to show the best of it. Still not happened, and now as the days get shorter and darker, I fear I might not be able to get good pictures till the snow comes and it all gets white, light and sunny again.


Friday, September 12, 2014

Pillow case in monoprinting technique

Last month we've made this fun project with kids. It was a rainy afternoon, we had strawberries, ice and cookies, but the objective was to craft a pillow for a friend who was going to leave Finland soon. And this gift was a gift from kids.

Each of them got a piece of plexiglas plate, we helped to put paint, and they drew something onto. We had some horses, dragons, fishermen, but also princesses, houses, a mermaid and other simple things. And there has been a toddler as well who simply put some abstract lines and we helped him make a hand print.

The drawing have been made in monoprinting technique, the kids have been using the cotton swabs. We put a piece of cloth onto each plexiglas plate with a drawing and got a print. It's tricky sometimes, as they come out more or less saturated, and the drawing is more or less clear.

This time instead of putting the names of kids, I've made the ABC, because some kids have made two pieces, the ages were different and I wanted to avoid comparison and evaluations. The ABC keeps it more neutral, but adds an interesting detail. and will be useful, since our friend has two small kids who may enjoy having around this fun pillow to read.

Don't be surprised about muted colours, because this pillow was custom made and it simply has to be muted to best fit the home of the recipient, so yes, though it was not exactly a custom order, but sort of what our custom/friend would have expected. Next project will come in vivid colours as usual, I promise!


Monday, September 8, 2014

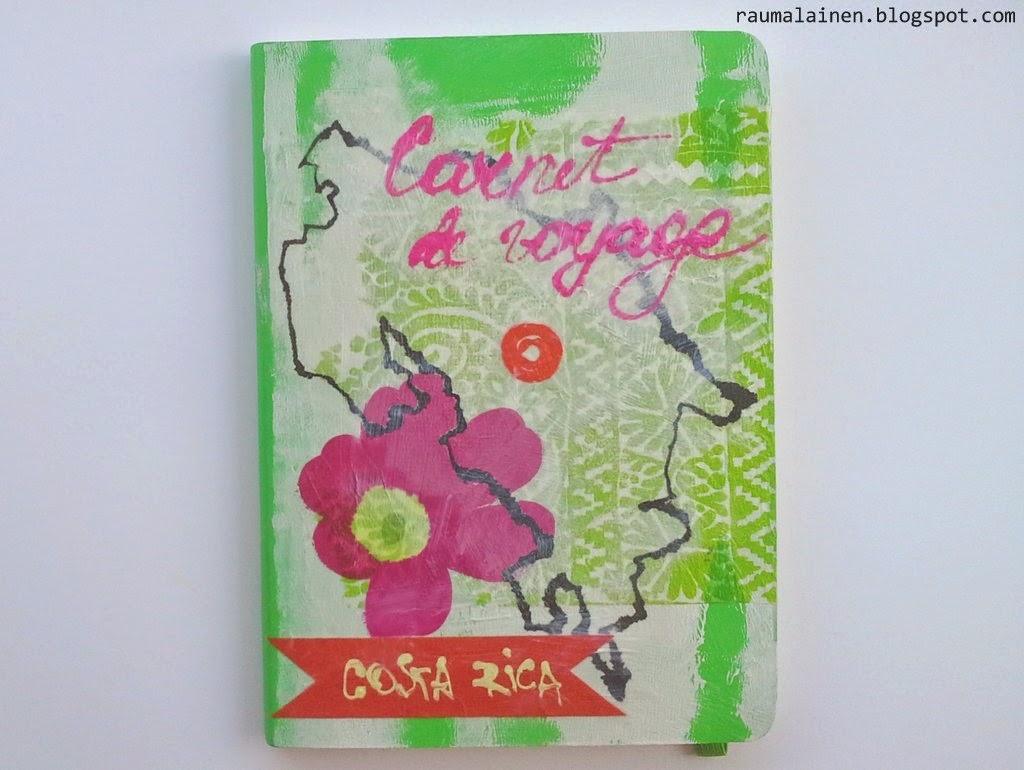
Quick weekend project - a traveller notebook

Hi there! Just a sneak peek of a project shortly done at a last minute past weekend. It is going to be another busy renovation week at our place, but I hope I can pop up another time soon. There're some more fun upcoming stationery projects I wanted to talk about here. And probably this one deserves a tutorial as well. We'll see by the end of the week. 

No we're not going to Costa Rica, but our friends do. 

That kind of projects is always welcome - a notebook in a nice colour and freedom to make whatever I want, subjet to the only condition that the destination had to be mentioned. 


Tuesday, September 2, 2014

DIY-tutorial: MAGNETS

Hello my friends, and hello blog, I haven't forgotten any of you! Yes, it's been quite a long time here with nothing new. And you know what? I've spent a very busy summer indeed. And no I'm not kidding. I was just not busy with the blog. Not at all, and yes, I'm sorry for the break. But it was very much needed. 

There's been lot of thrifting, furniture moving, repair, repaint and more moving. It's our third year so far in Finland, in this rented place. During our first year I didn't bother about poor rented furniture which came along with the house to actually spare us the furniture shopping. During our second year I got pregnant, the baby boy was born (a toddler already by the way), I was too tired to make any shifts. 

So now by the beginning of the summer I started changing things. Moving the rentals out and filling the gaps with what we need, what we like and what feels like our place.  

I mean, yes, why bother, you would probably ask. And sometimes I ask myself as well, pretty the same question. I will certainly not make over everything. But with a good dozen of nice pieces here and there, some more work to move around, repaint, and customize the existent and neutral ones, with thrifted accesories and nice modern fabrics it's surely doable. I'm not that far yet, but the way feels right. It's a crazy amount of work, taking into account that I made it during the summer, when both kids were at home all day long.

So far so good. Now it's time to make over the blog. It's insanely outdated, all the features are so bothering me. I wish I could not write those lines and first make some steps, so that you see the results. But I guess it has to be more of a complete make over, and now I'm up to learn how to do it. I don't know yet if I'll keep the name (nice, but long, and that bums me out), this format is not going to last, I'm literally sick of it, and probably that's the reason I was not that much present here either.

Now let's get back to crafty life, my friends. It actually hasn't stopped, but it's time to give you another inspirational project! Thrifted have been: an old frame, and ply wood - to make a fun magnet board and cute magnets.

This tutorial is about the magnets, not the board. Just a few words about the latter: it was old, big and heavy,  and sad - something golden and grey and crimson  - with a poor oil painting inside. I have sanded and repainted it in red. I also made an inlet of a piece of fiberboard that I cut to size, and coated it with magnetic paint. That's all! And I have to say I'm THAT jealous and happy about a good friend who got this gift. 

Happy birthday, Céline!


Sunday, July 27, 2014

Wooden pirate play sword - DIY tutorial

Hey there!

This morning my little girl has been looking though her magazine and stumbled upon an article about pirates. "I need a pirate sword" - she told me. "Here're also instructions, mum. You have a piece of cardboard right?"  Yes, I had a piece of cardboard, and why not, I mean any pirate needs a sword, I agree. And yes, why not playing pirates? But sword of  a cardboard? Nope.

It got my wheels spinning around. Yes, I could have waited till tomorrow and go buy a simple plastic sword, or, even better, go to a second hand toy store and hope there'd be an old toy sword for sale. Or make it myself right now. A nice simple wooden one. 

Cutting a simple sword shape out of a wooden board scrap? Why not, but probably way too simple and not that interesting. Making a grip somehow different, maybe something more rounded for nice hold? A couple of minutes later I had it in mind and the baby boy has been napping. I figured out it wouldn't take too much time and luckily I could almost finish it pretty quickly.

It hasn't got any special finish, nor could I photo shoot it properly, with probably a cute pocket I could have done, but not yet. I still do not know if we'll continue riding this pirate wave, so I just share this tutorial right now, or I may simply loose it in many drafts and projects-on-go.