Pages

Sunday, June 8, 2014

As of late - painting outside

Let me get a bit restrospective now, my friends and explain you this new tag "Paintings"
Like about four and a half years ago when we moved to Normandie for what turned to be two years, and when my little girl was a baby of a couple of months old, that was the time when I started less figure drawing and more landscape drawing. And I've discovered the most astonishing seascapes of just unbelievable colors and beauty. That's how I got to paint outside, en plein air. It took me a couple of years to get to feel that I had enough confidence and knowledge to leave the little corner of the living room where I was painting from field drawings and little thumbnail value sketches. Then we moved to Germany.

If you have ever tried to paint anything outside, even if you fail,  many times as I did, but get back and stick to it, I guess you understand me saying that's something you get addicted to and never look back painting in a studio. There's this something special in the air that you and your painting need to get depth and emotion and this sence of life and light that you would otherwise never capture if you're not painting on field.

We left Normandie and I never painted any landscape for more than two years until a friend of mine leaving Finland asked me to draw a house of hers. I didn't think of painting it first, and just a couple of days prior to her farewell party I grabbed my paints, palette knives, the easel and a piece of cardboard, and drove to her house with my little baby boy who was happily sleeping in the car nearby while I was outside painting. If I'd fail I would still have an evening to make a charcoal pencil drawing from photos that she sent me.

I don't have the feeling I've failed this one. I like it. And I'm happy my friend's family enjoys it as well. I don't know if I get back to paint, but for the first time since I left Normandie I felt this mix of drive, happiness, pleasure, and joy of intense work while painting a landscape, well, a house in a landscape. Yes, working on other projects feels similar, but this very special feeling from painting outside got somehow lost with time passing by, our moves over three countries, growing family, getting grounded and making new friends, so I am just THAT happy to reconnect with it.  Just THAT happy!


Tuesday, June 3, 2014

Stenciled pillow cases with reindeer

Lately I've bought simple pillow cases in a department store. I wanted to try out some fun and simple techniques without being strained to sew a classic pillow afterwards. This one was an inexpensive model, in a slightly weird color in my opinion, but I loved the texture (similar to linen) and didn't what to buy something too fancy/high-end to be scared to experiment with afterwards.

Having a pillow ready-made would force me to be more spontaneous and work fast.

And that's what I had to do - a friend of mine was going to leave Finland, so talking about different options what to gift her just the day before, I suggested I would like to try to make a printed pillow with some "finnish" motif. That's how the reindeer came into the scene. And as I didn't know what type of colorway she would chose, I've opted for neutrals - beige, brown and white.

I've planned only to stencil, but couldn't not add a bit of something to enhance the image and outline it in matching brown color (terra verde). For myself I would probably outline the reindeers in turquoise or neon pink (as I did a mock-up in photoshop at the end of picture line), or maybe even print it in some crazy color (which I would not recommend in case you're not a close friend of the recipient). Or maybe put some text onto - keeping all that in mind I guess I should get back to the shop for another couple of blanc pillow cases. Stay tuned!


Friday, May 30, 2014

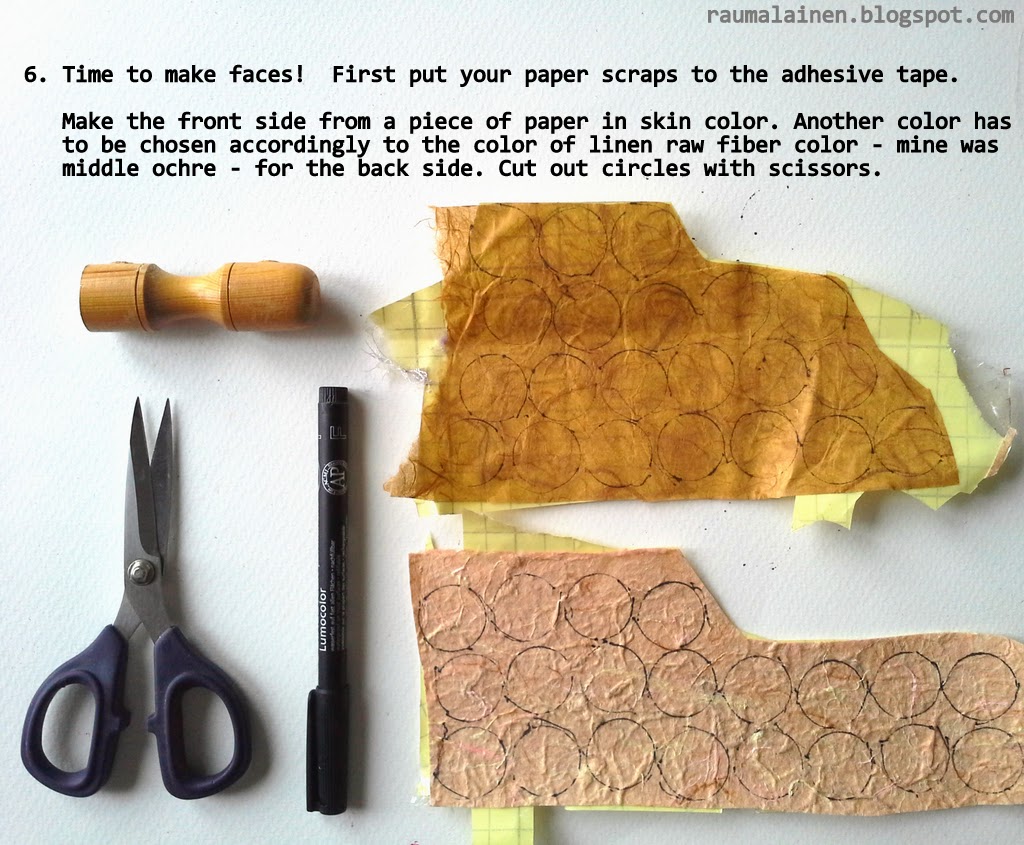
FLOWER PIXIES - DIY-tutorial

Remember, last week I was talking about an upcoming tutorial how to make the flower pixies that were decorating my little girl's invitation cards? Now that's it, it took me a bit longer to get it finished.

Yes, I admit, you need time to make those, but actually the difference between making a couple or a whole bunch of them is not so big. So you better have a project where at least a dozen of them is necessary. Despite of time spent (appr. 2-3 hours) you will enjoy the final look, believe me!

And you know what? That's the project you can endlessly decline for any festive occasion. Need something to decorate a branch for next Easter - take spring Easter colors (yellow, pink, apple green, light blue). For Halloween - orange, some greyish soft lila, greys and blacks. For Christmas - ivory white, golds and some warm greys. They are going to look fantastic if you match nice colours and make a bunch of them.


Monday, May 26, 2014

HOME sweet home - DIY tutorial for mini-album

Here's another fun stationery project. This one came spontaneously, because I had to make a greeting card, and I realized I wouldn't be able to put everyone's words into it properly without a confusing multitude of teeny-tiny phrases around on the inside. So I made an album - with pages just big enough for one person/family to put just a bit more than a common wish-you-something phrase.

This album had to accompany a gift for a house warming party, that explains the motif choice and the heading

Quite a simple album - only punched pages, bound with a raffia thread. No fancy cover/cardboard, because this album is somewhere in between a mini album and an extended greeting card.

TIP: there're many steps where you make and let dry. And that may be annoying (well that IS anoying in my opinion - sometimes you can make another step while waiting, and sometimes you have to completely switch to another project while waiting, and I don't normally like to switch unless I absolutely have to). I've put my album into the oven at 50 degrees Celcius, the liquid paint and gesso dried in about five minutes there, while normally it takes about half an hour.

That's it - it takes a bit longer than a greeting card, but it's worth it! Now let's break down step-by step!


Thursday, May 22, 2014

A new collaboration with kids - PILLOW CASE

This pillow case has been a very looong project.

Remember, back in January-February this year we've been collaborating together with my little girl on a serie of fun pillow cases in techniques of monoprint, drawing, appliqué and stencils. They are here, and here, and also there.

This collaboration was with a little girl of a good friend of mine. And this little girl is a very good friend of my little daughter, and she has been always curious about what I make and how and what she could possibly craft as well. That's why I've suggested that we make something special for her mom's birthday in spring. Because this little girl is regularly coming to our house I suggested we make something step-by-step, working each time like about fifteen minutes. Now it's finished, offered and now I can publish the results.

This project had to take us as about four sessions to complete: 1) monoprint, 2) free hand drawing, 3) stencils and 4) making a drawing on paper so that I could transcribe in into fabric appliqué. 

In a real life it has been more tricky than that. We had some discussions about colors, that her mom likes/dislikes, we had to make some changes, and she has been picky about what fabric pieces to use, or not to use, because she didn't like the results of her own work. So we started over and over again. And I had to find out ways to have matching parts and revisit the whole layout so that I could guide this little girl and help her. All in all it took us about three months with all the non-productive add-on's as flus, vacations, etc.

The end result is something that is completely different from my initial idea, which was about flowers in pink, orange, with greens in between. Somehow we got a little manikin character there, and blue colors, and an apple tree - they were all elements this little girl wanted to have, and I just rearranged as long as I got finally satisfied and realized that the layout felt right.

It was huge fun. I don't bother at all that we got this unexpected thing at the end, and I just LOVE it. This is the message this little girl wanted to convey, and the colors which she/her mom love, so yes, this part was challenging. The end result was worth all the efforts.


Tuesday, May 20, 2014

Workshop for kids - making a birdy

Looking for a fun idea how to keep kids busy for half an hour during an anniversary party? Skip if not, or stay otherwise, because it's easy, fun, with very nice and pleasant results. All you need is some extra stuff, that is easy to find at any craft and construction materials department store. Today I only show you the mock-up, which I've prepared to see if it works. And yes, we've already finished them with kids, but I have unfortunately no photos with finished birdies which I could share.

The busy part was to craft them prior to anniversary, which took me three sessions - paper balls glueing, support making, assembling altogether and staining, and you have to have at least two days, because they have to dry thoroughly in between.

The kids got the birdies on supports, then they painted them with acrylic paint, put eyes and feathers. Sounds easy, right? And quick. In real life it was easy - yes, but not as quick as I expected  - our little participants wanted to exchange colors, they spent some time to color them properly, and then they mixed colors and watched, and helped their neighbors. I've planned about fifteen minutes for that project, and we've spent like thirty-five minutes or so.

ADDITIONALLY: I've stained wooden supports, because it was cheap wood that I was using, so staining it was better. Beaks were made of pencil tops, which was intriguing for kids - making a birdy which can WRITE! And we only put eyes and feathers. No wings, as in the mock-up, otherwise the whole workshop would take fifteen minutes more, and the kids (4-6 y.o.) would get tired to continue at that point.

I'm going to repeat this workshop one more time, and hopefully get some pics for you. Stay tuned.


Wednesday, May 14, 2014

Invitation cards

I've been making the invitations lately. For an anniversary party - my little girl has turned five years old. It's spring time (a bit fresh and cloudy though), so we came up with flower theme, and colors. We both love them. And there're also princesses, or pixies, or whatever, because there HAD to be a princess. I agreed, so please meet a small keepsake we've put onto each card - not exactly a princess, but something that we BOTH love. That was new. Before all the cards we've been making were flat - hand painted, hand printed, with scraps of paper, and stamps (here how we started and here the final layout from the last year). By the way the keepsake is pretty easy to put into the envelope and not bulky as I thought it might be.

I had white middle heavy paper (200g/m2), color papers, Marimekko napkins, paint, linen raw fiber, raffia and cheap net lace - that's all. Nothing fancy from the world of card making/scrapbooking. Only simple things. Only basic essentials. Plus something new for a challenge and inspiration. It was fun. And mostly it's my project, because we didn't have much time to make them together, so I've been working mostly during naptime in the mornings when my little girl was at school.

My thought afterwards? I like how it turned out. It's girly, it's full of colors and textures, it's combining lots of techniques I already know pretty well and love, but also introducing some new materials like linen raw fiber and raffia, and working 3D. I wish I'd work less alone on them and more with my little girl. I could have possibly developed an idea of monoprinting with her, or small collage, but the time was short. Anyway she was inspired and is now working on her own pixies which is great. 

Curious about how exactly they've been made? Come over by the end of the week - for TWO step-by-step tutorials how to make the cards and the pixies. Stay tuned!